Accurately capturing any bugs or issues you encounter is crucial when working in QA. Screenshots are always appreciated by developers, but screen recordings can be a more useful tool for certain situations, especially on iOS and Android.
Capturing the moment you need on iOS and Android is easy, once you’ve set up your device to quickly access the screen recorder. We explain how to set up and use the built-in Screen Recorders on iOS 14 and Android 11 in this post, as well as on our YouTube Channel.
Here’s How to Easily Screen Record on iPhone
iOS 14 supports a built-in screen recorder, so finding and using third-party apps is no longer needed. This feature is hidden by default, but you can add it to the control center for easy access.
Add Screen Recording to Control Center
In order to easily access the screen recording function, you must add it to the Control Center. This will allow you to easily start and stop recording as needed. When testing mobile apps and looking for bugs, having this feature handy can make capturing bugs a breeze.
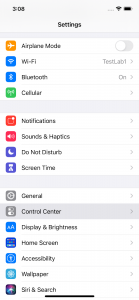
Step 1: Open Settings
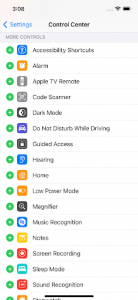
Step 2: Select Control Center
Step 3: Find Screen Recording and select the green Add (+) button next to it; this will move the app up to the top of the list with the active features. You can also rearrange the Control Center apps by selecting the three lines on an app and dragging it to the desired position.
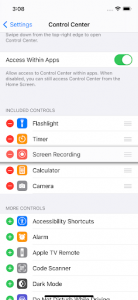
Now, you can quickly access it to take screen recordings.
How to Screen Record on iOS
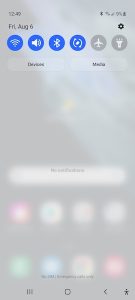
Step 1: Access the Control Center
For iPhone X or newer, swipe down from the top right to access the Control Center; for older iPhones, swipe up from the bottom of the screen.
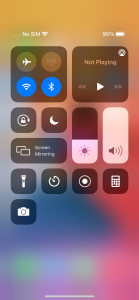
Step 2: Record Your Screen
Select the record button (the filled-in circle with a circle around it) for Screen Recording; this will count down from 3 and then begin recording the screen. You’ll know it’s recording as there will be a red timer at the top of the screen for newer devices, and a red bar at the top of the screen for older devices.
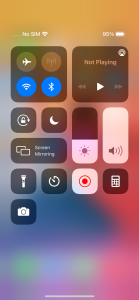
Step 3: Stop Your Recording
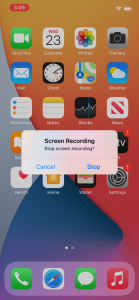
When complete, open the Control Center and select the Screen Recording app. For older devices, you can also select the red bar at the top of the screen which will bring up a pop-up asking if you want to stop screen recording. Select Stop to end the recording.
Step 4: Find Your Recording
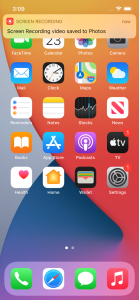
Each recording is automatically saved to your Photos. Select the Photos app to find, view, and share your recording.
You can easily access and change the Screen Recording settings by opening up the Control Center and then tapping and holding on the record button. This will bring up the option to turn the microphone on or off.
You can also view our tutorial video for a visual demonstration:
Here’s How to Easily Screen Record on Android
Android supports a built-in screen recorder, so you no longer need third-party apps when using Android 10 and Android 11. Although this feature is hidden by default, you can add it to the Quick Settings to easily access it.
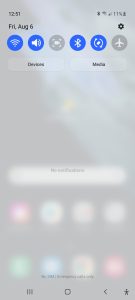
Add Screen Recording to Quick Settings
First, you must add the screen-recording icon to your Quick Settings.
Step 1: Swipe down twice from the top of your screen to access the Quick Settings.
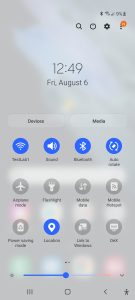
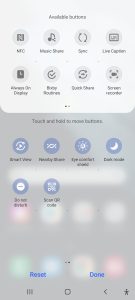
Step 2: Swipe right within the Quick Settings to find the Screen Record icon. If it’s not there, tap Edit and drag the icon to your Quick Settings.


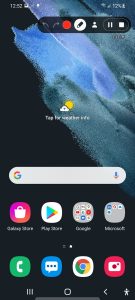
Now, you can easily access it to record your screen.
How to Screen Record on Android
Step 1: Open Quick Settings
Swipe down twice from the top of your screen.
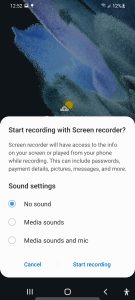
Step 2: Record Your Screen
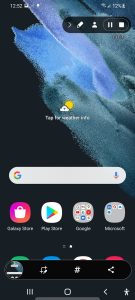
Choose what you want to record and tap Start. The recording begins after the countdown. You can use the built-in toolbar to draw on the screen, turn on your front-facing camera, and pause or stop the recording.
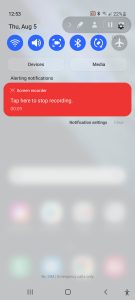
Step 3: Stop Your Recording
To stop recording, swipe down from the top of the screen and tap the Screen recorder notification. Or, use the toolbar to stop recording.

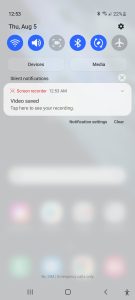
Step 4: Find Your Recording
Initially, you can select where the recordings are saved, either once or always. You can also find the recording in the notification bar; select it to find, view, and share your recording.
You can also view our tutorial video for a visual demonstration:
Screen Recording for QA Testing
Screen capturing and screen recording are invaluable tools for QA testing. By setting up the screen recording function in the Control Center and Quick Settings, it allows QA testers to easily and quickly capture the issues they encounter while testing mobile devices. App developers are then able to view the issue as it occurs, which gives them a better understanding of what is happening. This will hopefully provide them with the details they need to fix the problem.
Our QA analysts take screenshots and screen recordings on iOS and Android every day. Being able to easily create and share the issues they encounter is part of the job, but screen recording can be useful for more than just QA testing. Make sure your iPhone is ready to take screen recordings as needed.
Feel free to reach out to us with any questions!