Building a mobile application has the potential of reaching thousands – if not millions – of people across the world. Every year the number of apps available on the market increases and so does the number of users on various devices.
So before you dive into developing an app it’s important to look at the steps it takes to deliver a great app to the end user. You will need to plan, build, ship and test your application to make it successful.
I. Define a plan and a schedule
For any kind of project, the planning phase is essential. After working a few weeks on a project it’s easy to get off track and forget some of the original elements you planned on. So the first step is to create a project requirement document: include the project milestones, the team members, and the tools and applications you will use to design and develop the product. You can also list what communication channels you will use (email, Slack, conference calls) and who is responsible for each part of the project. Even if your team is only 1 or 2 people it’s important to have a plan you can use as a roadmap from the beginning to the very end of the project.
Pick your tools on day 1 and make sure it’s appropriate based on the size and the type of app you are creating. In a recent post, we shared our favorite bug tracking tools. Tools such as Jira and Pivotal tracker can be used to report and track bugs and you can also manage sprints, create tasks and include estimated time for the development and design team. The most common calendar tools you can use are Google Calendar, Microsoft Outlook or Apple Calendar.

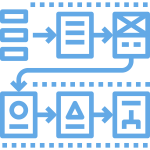
II. Design your application workflow
Sketch your app.
Before you start designing the user interface or begin development, it’s important to plan your application workflow to understand how all user scenarios will work and how the end user will navigate your app. And at PLUS QA before we begin documenting that application workflow, we will start by sketching it all out. If you are interested in learning more about designing and sketching your app, medium.com is a great resource: https://medium.com/sketch-app-sources
Document the user workflow and user interface.
Once you have decided on a workflow you can create some wireframes or design mock-ups so you can get to your design and development.
If you are looking for an application to design workflows checkout some of those tools: draw.io, Lucidchart, OmniGraffle or ArgoUML.
Gather beta users’ feedback.
Gathering feedback from your team during the design process is beneficial during this phase of the project. Presenting a prototype and receiving some user feedback will help you to design a good product and avoid user feedback at a later time during your app development.

III. Choose the most appropriate tools
Coding tools.
When you are ready to start coding, choosing the right text editor is essential. You will be working with it on a regular basis as you build your app so it’s important that it’s a tool you enjoy working with.
We recently posted an article about the best text editor to start coding with; you can read it on our BetaCrash blog.
Track stories and bugs.
In order to track stories and functional requirements, you can use different applications such as Google docs or the project management tools we listed earlier in this post. Jira is a popular tool but if you have a small team, open-source applications such as Redmine can be a great solution. In addition to that, tracking all the project milestones in a calendar is necessary so you can make sure you are on schedule with your project.
For stories and tasks, you have a lot of different options, and the ones you choose will depend on the size of your team and the type of project.
IV. Select a tool to share apps with your team
Once you have completed the first version of your app, it’s time to distribute it to your team. In order to do that you can use various tools such as TestFlight, HockeyApp, or Crashalitycs. At PLUS QA we have built a cost-effective and easy-to-use custom solution to ship mobile applications: BetaCrash
BetaCrash is used by developers to share beta Android and iOS apps with QA testers and with their own team. With BetaCrash, simplicity is key, allowing fast, efficient, and easy sharing throughout the testing process. You can also retrieve screenshots and crash reports directly from user devices while they look at your app.

V. Test your app
Create a test plan and a testing strategy.
One of the most critical steps of your product development is testing. Some teams try to handle it internally, but if you plan to release an application to thousands of users you need to have a solid test plan and a reliable testing partner. When it comes to testing you want a team of professional testers, a good device coverage test plan and a process that facilitates and accelerates the release of the application. What matters in testing is the quality of the final product and the value it brings to the app when the end user has it on his device.
Conclusion
Whenever you release an iOS or an Android application you will want to consider each one of the steps that we reviewed above. Take some time to review the different tools available before moving forward with designing, coding, and testing.
Picking the right tools for you and your team is a crucial step of the product development. After that, tracking the project milestones and the different roles and responsibilities of your team will allow you to release a great product. Don’t forget to pause during the design and building phases to gather feedback from beta users so you can improve the quality of your product throughout the development cycle.
If you are interested in learning more about how we test hundreds of apps and build solutions to facilitate the testing process, please reach out to us: testlab@plusqa.com